
What Is Calisthenics? A Beginner’s Guide to Bodyweight Training and Basic Exercises

If you’ve come across calisthenics videos, there’s a good chance you’ve watched them and thought, “I’d love to do that.” I say this as someone who’s been getting briefly excited about calisthenics on and off for years. You see people pulling themselves up on bars, walking on their hands, or holding their bodies parallel to the ground. Then you remember your own three push-ups. I can just about get along with the push-ups. But once the pull-ups and their many variations appear, I’m usually in the “I don’t think this is for me” camp. A few friends of mine have been doing calisthenics for years. Some of them are really good, too. Whenever we talk, they tell me, “It’s not that hard. You build up to it.” Of course I know you improve with time. Those moves still don’t look particularly easy to me, though. Anyway, enough about me. This is for anyone who actually wants to get started. 🙂
Calisthenics is a form of strength training that mainly uses your own body weight for resistance. Push-ups, squats, and pull-ups are some of the best-known examples. You’re not expected to do what you see in those videos on day one. You start with an exercise that suits your current ability and learn to do it well. You can train at home, in a park, or at a gym. Some exercises only need a bit of floor space, while others call for simple equipment such as a bar. Let’s go through the basics first, then look at what your first few sessions might involve.
What does calisthenics mean?
The word comes from the Greek kalos, meaning beautiful, and sthenos, meaning strength. Today, it usually refers to strength and body-control exercises performed using your own body weight. Your muscles work to move your body or hold it in a particular position. In a push-up, you push against the floor. In a pull-up, you pull yourself toward a bar. In a plank, you keep your torso steady.
So calisthenics covers much more than the advanced moves you see at outdoor workout parks. A wall push-up can be a starting point, too. Not being able to do a push-up on the floor yet doesn’t stop you from getting started.
Can you do calisthenics without any equipment?
Some of it, yes. But not every exercise. You don’t need a set of weights for squats, lunges, push-ups, or planks. For pull-ups, though, you need a secure bar. Standard dips need suitable parallel bars.
That distinction matters, especially when it comes to training your back. Doing push-up after push-up and adding a few planks won’t cover your pulling work. Rather than deciding you’ll never use any equipment, it makes more sense to look at what the exercises you want to do actually require. If there’s a calisthenics park nearby, that could make things easier. We’ll come back to parks in a moment.
How is calisthenics different from weight training?
Calisthenics is a type of resistance training, too. The main difference is how you create that resistance and make it more challenging over time.
| Topic | Bodyweight-focused calisthenics | Free weights or machines |
|---|---|---|
| Main source of resistance | Your body weight and position | External loads such as dumbbells, barbells, or machines |
| How you progress | Change the angle, assistance, range of motion, or exercise variation | Increase the weight, often in smaller increments |
| Where you train | Home, a park, or a gym | Somewhere with the equipment you need |
| Example | Move from push-ups with your hands on an elevated surface to push-ups on the floor | Increase the load on a chest press |
You don’t have to choose one and give up the other. You can work on pull-ups and use weights for your legs. As you get more advanced, you can also add external weight to calisthenics exercises. ACSM’s 2026 guidance also identifies bodyweight exercises and home-based resistance training as effective options. So you don’t have to join a gym before you can start.
Who is calisthenics for?
If you don’t fancy going to a gym, want to do some strength training at home, or enjoy working out in a park, you could give it a try. It’s also an option if you want to add strength work alongside running or cycling.
There are calisthenics exercises at very different levels. It’s easy to see an advanced video and talk yourself out of starting. That’s part of what puts me off, too. But you can begin with easier options such as wall push-ups, sitting down onto a chair and standing back up, or assisted pulling exercises. What suits you depends on what you can do right now. Using your own body weight doesn’t automatically make a workout easy.
During your first attempts, pay attention to whether you can control the movement, keep breathing, and maintain your form through the last few reps. If you have joint pain or an existing injury, get professional help choosing suitable exercises.
6 basic calisthenics exercises for beginners
These are exercises you’ll come across often. You don’t have to do all of them on your first day, and you certainly don’t have to start with their hardest versions.
1. Push-up
Place your hands roughly shoulder-width apart or a little wider. Keep your abs and glutes engaged, bend your elbows, lower your chest toward the floor, and push back up. Your hips should rise with your chest rather than lagging behind. Push-ups work your chest, triceps, and shoulders while also requiring you to keep your torso steady.
- Make it easier: Put your hands against a wall or on a stable, elevated surface that won’t slide. Gradually lower the surface as you get stronger.
- Make it harder: Once you can do controlled floor push-ups, try lowering more slowly or adding a brief pause at the bottom.
- Watch out for: Your lower back sagging or only your head moving toward the floor. If that happens, choose an easier version rather than adding more reps.
Don’t dismiss wall push-ups, either. If your form falls apart after three reps on the floor, starting at a wall or on a higher surface makes more sense.
2. Squat
Stand with your feet roughly hip- to shoulder-width apart. Bend your knees and move your hips down and back, then stand up. Keep your feet planted and let your knees follow the direction of your toes. Work within a depth you can reach comfortably and control.
- Make it easier: Sit down onto a stable chair and stand back up with control. Make sure the chair can’t slide.
- Make it harder: Slow down the lowering phase or pause briefly at the bottom.
- Watch out for: Forcing a particular stance or depth because someone else uses it. Don’t squat past the point where you can stay balanced just to match a video.
3. Pull-up
Grip a secure bar. Pull yourself up with control, then lower back down, rather than swinging to build momentum. If you can’t do that yet, use foot support or an appropriate assistance setup to reduce the load.
- Make it easier: Use a suitable low bar for a pulling exercise with your feet supported on the ground. If you use a resistance band, check its condition and make sure it’s positioned securely.
- Make it harder: Reduce the assistance. Once full pull-ups feel manageable, add a controlled lowering phase or a brief pause.
- Watch out for: Stretching your neck to get your chin over the bar. If you can’t pull yourself up, use more assistance. You don’t need a full pull-up on day one.
4. Dip
A dip is a pushing exercise in which you support yourself on parallel bars, lower your body, and press back up. It takes shoulder and upper-body control. It’s a common calisthenics exercise, but it doesn’t have to be in your first workout.
- Make it easier: Use suitable parallel bars with foot assistance and a short, comfortable range of motion. If that’s still too difficult, build your pushing strength with incline push-ups first. They’re a preparatory option rather than a direct replacement for dips.
- Make it harder: Gradually reduce foot assistance until you can control your full body weight. Don’t confuse progress with forcing yourself deeper.
- Watch out for: Pain at the front of your shoulder. Stop if it hurts. Putting two chairs next to each other at home doesn’t turn them into safe parallel bars.
5. Plank
Place your elbows under your shoulders and support yourself on your forearms and toes. Hold your position without lifting your hips too high or letting your lower back sag. Keep breathing.
- Make it easier: Put your knees on the floor or rest your forearms on a stable, elevated surface.
- Make it harder: If you can maintain your position, move your elbows slightly farther forward to lengthen the lever.
- Watch out for: Losing your position just to stay up for longer. Short, controlled holds are enough to begin with.
6. Lunge
Start standing, step one leg back, and bend both knees to lower with control. Push through your front foot to return to standing. Adjust your step length so you can stay balanced.
- Make it easier: Hold a stable support lightly and do a split squat, keeping your feet in place.
- Make it harder: Slow down the lowering phase of an unsupported reverse lunge, or pause briefly at the bottom.
- Watch out for: Wobbling from side to side on every rep. Use support first, get comfortable with the movement, then reduce the assistance.
A sample 20–30-minute beginner session
We’ve covered the exercises. What might a workout look like when you put them together? The table below gives you an idea. It’s a general example for a healthy adult who can exercise without pain. You can reduce the reps to suit your ability. If you want to train three times a week, you could try Monday, Wednesday, and Friday, with rest days in between. If you haven’t exercised in a while, starting with two sessions a week is fine, too. It’s better to ease into a routine than squeeze in three sessions straight away and manage none the following week.
Allow about 5 minutes to warm up. Walk in place and gently move your shoulders and wrists. Then try a few easy squats, supported lunges, and wall push-ups. Don’t go straight into the exercise you find hardest. Allow roughly 15–20 minutes for the main workout. Finish both sets of one exercise before moving on to the next. On your first attempt, you can start with one set of each.
| Exercise | Sets × reps / time | Beginner option |
|---|---|---|
| Squat | 2 × 8–10 | Sit down onto a chair and stand back up |
| Push-up | 2 × 5–8 | Wall push-up or hands on an elevated surface |
| Assisted pulling exercise | 2 × 5–8 | Foot-assisted pulling on a suitable low bar |
| Reverse lunge | 2 × 5–6 per leg | Supported split squat |
| Plank | 2 × 10–20 seconds | Knees down or forearms on an elevated surface |
Rest for around 60–90 seconds between sets. If you need longer, take it. Just because the table says eight reps doesn’t mean you should struggle through the last three with your form falling apart. Aim to finish each set feeling as though you could still do a few more reps with the same technique. When you’re done, walk gently for two or three minutes and let your breathing settle. These times are approximate. If you need longer rests, the session may run a little longer.
If you’re thinking, “I don’t have a bar at home. What do I do about the pulling exercise?”, you can leave it out that day. Just be aware that your session will be missing pulling work. Training at a park another day or using a resistance band with a suitable anchor could help cover it. Lying face down and raising your arms won’t replace a pull-up. I’ve left dips out of the table. You don’t need to push yourself through those as well as push-ups when you’re starting out. Get comfortable with this routine first, then adjust your exercise choices.
When should you make the exercises harder?
Say you’re doing push-ups with your hands on an elevated surface. If you’ve comfortably completed two sets of eight for several sessions, try lowering the surface a little. If squats are starting to feel easy, slow down the descent or pause briefly at the bottom. Just don’t change everything at once. If you lower the support and add reps and sets at the same time, it’s hard to tell which change was too much. Change one thing and see how it goes.
You don’t need a complicated app to track progress, either. A note on your phone with the exercise, variation, and reps is enough. A few weeks later, you can look back and see whether you’re moving forward or still doing exactly the same thing.
Training at home or in a calisthenics park
At home, you may be able to get started with a floor that isn’t slippery and enough space to move comfortably. If you have a mat, use it. It can make things more comfortable for your knees and forearms. If you don’t, there’s no need to put off training just because you haven’t bought one. Making sure any support you use won’t slide or tip over matters more.
Calisthenics parks usually have pull-up bars, parallel bars, and fixed supports at different heights. Of course, not every outdoor workout area has the same equipment. If you can find photos before you go, you’ll have a better idea of what’s available.
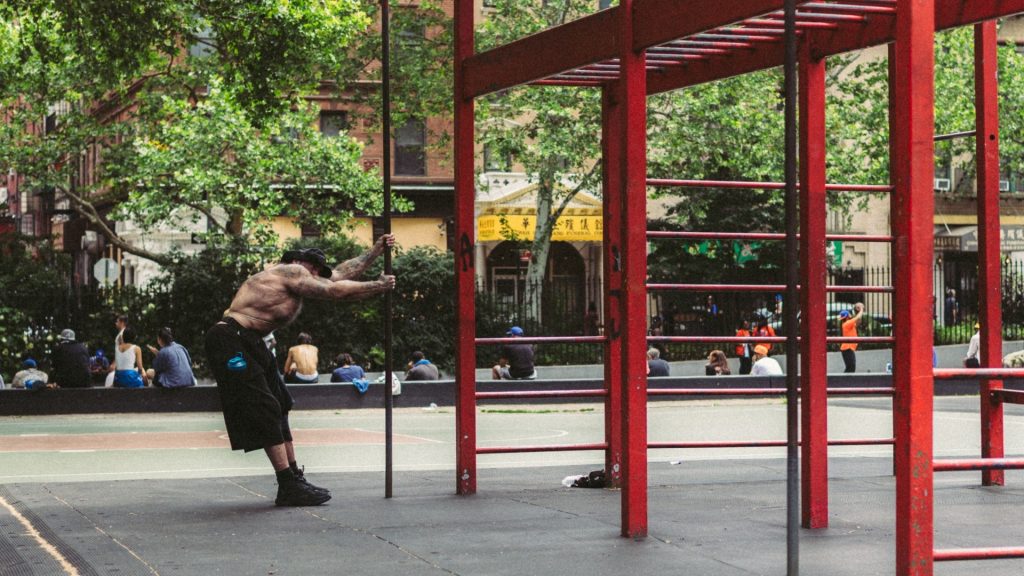
Once you’re there, check the equipment before using it. Is the bar loose? Are the grips wet? Is there enough space around you to lower yourself or step down? Have a look before you start, especially in wet weather.
Without a bar at home, it’s tempting to improvise. But looping a towel around a door handle or getting underneath a table you haven’t checked isn’t a great idea. If you use a doorway bar, the doorway and installation need to meet the product’s requirements. Don’t assume it’s secure just because it seems to sit in place. If you prefer training at home, deciding what you’ll do beforehand can help. Otherwise, it’s easy to do two exercises, check your phone, and let the rest break go on a bit longer than planned. Open the workout table, clear your space, and then get started.
What about runners, cyclists, and HYROX athletes?
If you run or cycle, adding strength training can sometimes feel like another job to fit in. You start thinking about getting to a gym and sorting out equipment, and somehow it keeps getting postponed. A short session at home or in a park could be a useful way to begin. For runners, squats and lunges offer a way to work on leg strength, while exercises such as planks let you practise keeping your torso steady. But if those movements become very easy, doing the same reps over and over may no longer be enough. You might need a harder variation or some additional weight.
It’s similar for cyclists. You can add upper-body and core work to your training. Just don’t assume discomfort on the bike means, “I need more strength; calisthenics will fix this.” Your riding position, bike fit, and overall training load could be involved, too.
If you’re thinking about HYROX, lunges, core work, and practising getting down to the floor and back up can be useful. But you’ll also need to prepare for sled pushes, loaded carries, and the other stations. Home training can be a starting point; don’t expect it to cover all your race preparation. If you want to work on getting down to the floor and back up, take a look at our guide to doing burpees. That doesn’t mean you have to add burpees to this workout, by the way. We’ve already got enough exercises for a first session. 🙂
How many days a week should you do strength training?
ACSM’s general recommendation is to train the major muscle groups at least twice a week. If you’re adding strength work alongside running or cycling, you could start with two short sessions and see how you recover. If your schedule is already demanding, there’s no rush to add a third.
It’s worth looking beyond the empty spaces in your calendar. Think about the run or ride you have planned for the next day, too. In particular, don’t try an unfamiliar strength workout just before a race. Find out how new exercises affect you during a normal training week first. We’ve discussed this balance in more detail in how often endurance athletes should do strength training.
Common calisthenics mistakes
The first is getting a little too attached to the rep count. You decide you’re doing ten push-ups, but after five, your chest and hips start moving separately. You can stop at five or switch to an easier version. Don’t change the movement just to finish the number you had in mind. Another is trying to finish every workout completely out of breath. Don’t be afraid to rest between sets. When you’re working on strength, you need to recover enough to do the next set properly. Sweating a lot or being too exhausted to get off the floor doesn’t tell you much on its own about how well you trained.
It’s also easy to keep doing the exercises you enjoy and put off the others. If your push-ups are improving, great, but keep pulling exercises and leg work in the plan, too. You can usually find an easier option for a movement you struggle with. Not recording your training eventually leaves you wondering how many weeks you’ve been doing the same thing. You don’t need to write a report after every workout. Just note the variation, sets, and reps.
Then there’s watching videos and feeling as though your own starting point isn’t good enough. As I said at the beginning, that’s part of what intimidates me, too. But someone else doing a muscle-up doesn’t mean it has to be your first goal. Learn an assisted pulling exercise first, then work out where to go from there. Finally, don’t try to push through pain. Tired muscles and painful joints aren’t the same thing. Stop an exercise if it hurts, and get it checked if the problem persists or keeps coming back.
Start calisthenics with a small step
For now, my own relationship with calisthenics is still at the stage of getting excited about it every so often. The bar exercises, especially, still make me hesitate. But you clearly don’t need those advanced moves to begin. If you’re interested, try some wall push-ups, squats, or assisted pulling exercises. Maybe you’ll enjoy it and keep going. Let’s just not expect to look like the person in the video on day one. 🙂
Frequently asked questions
Can calisthenics build muscle?
Yes. With regular training at an appropriate level of difficulty, it can support muscle growth. But if an exercise has become very easy, don’t expect the same progress from doing it exactly the same way forever. Adjust the difficulty, reps, or sets as needed.
Can I start if I can’t do a push-up or pull-up?
You can. That’s why we’ve talked about wall push-ups and assisted pulling exercises. If you can’t do the full movement, choose an easier variation. Your first full pull-up, in particular, may take time. Don’t treat it as an entry requirement.
Do I need to train every day?
No. Two or three sessions a week, with time to recover in between, may be enough to start with. You don’t have to push the same muscles hard every day. Gently practising a movement and doing a challenging strength session are different things, too, so keep that in mind when planning your week.
Does calisthenics burn fat?
Exercise uses energy, but there isn’t a simple calculation where a set amount of calisthenics guarantees a set amount of fat loss. What you eat, how much you move throughout the day, and your overall routine matter, too. In particular, don’t expect extra ab exercises to remove fat only from your belly.
What should I buy to get started?
You don’t have to begin with a shopping trip. First, see what you can safely do at home and whether there’s a suitable park nearby. Once you’ve settled into a routine, you can consider a suitable bar or resistance band if you need one. Don’t get stuck trying to complete your equipment collection before you start.