
What is a SkiErg? How to use HYROX’s first station and which muscles it works
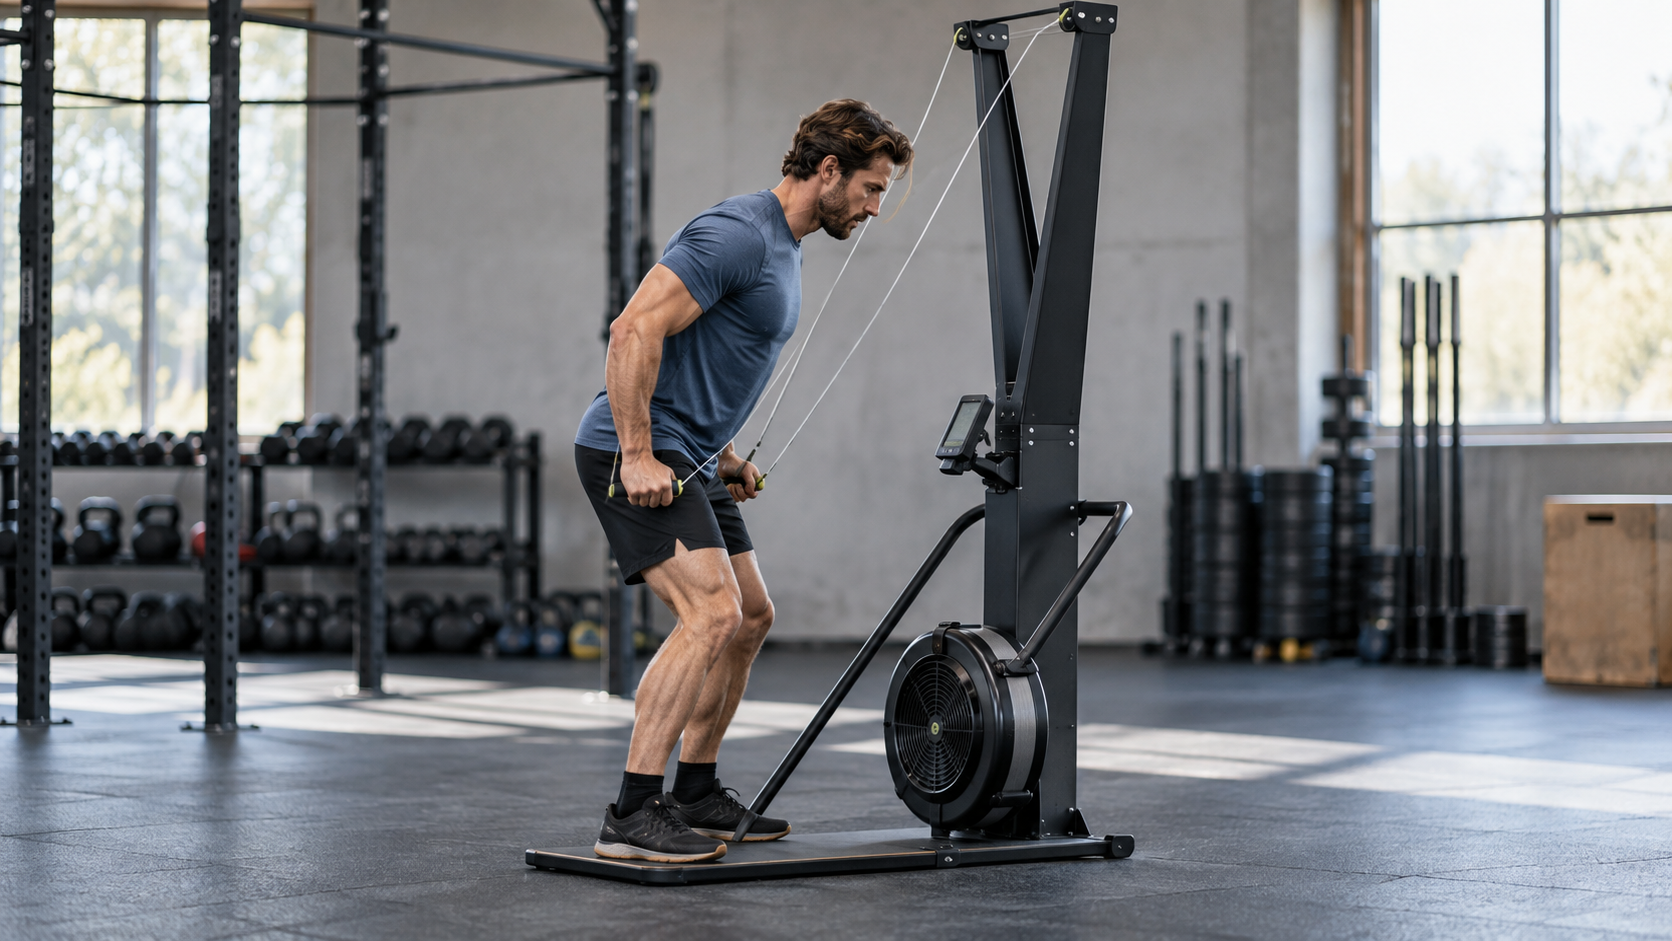
You’ve probably seen someone at the gym pulling two handles down from above their head. That’s a SkiErg. It looks simple enough from a distance, but once you step up to the machine, you quickly realise there’s a bit more to it. SkiErgs also appear in plenty of HYROX videos, though you don’t need to be training for a race to use one. If you’re thinking of adding it to your gym sessions, learning the pulling technique is a good place to start. Because when you try to do all the work with your arms, even a couple of minutes can feel very long.
What is a SkiErg?
A SkiErg is an ergometer that recreates the poling motion used in cross-country skiing. We’re talking about the kind of skiing where athletes propel themselves across flat or rolling terrain, rather than head downhill on an alpine piste.
You stand in front of the machine and pull both handles down from above. Each pull spins an air-resistance flywheel inside the machine, while the monitor shows data such as distance, time and pace. The metres on the screen are calculated from the work you produce.
At first glance, it might look like an arm exercise. But your torso, hips and legs all contribute to the pull. That’s one of the main things to remember as you learn the technique: don’t leave your arms to do everything.
The SkiErg in HYROX: 1,000 metres after the first run
In HYROX, you reach the SkiErg station after your first 1 km run. You complete 1,000 metres on the machine, then head back out to run again. So using a SkiErg when you’re fresh at the gym can feel quite different from using one during a race.
You may still feel strong when you arrive at that first station. But there are another seven runs and seven stations ahead of you. Trying to finish those first 1,000 metres as fast as possible shouldn’t make the rest of your race harder than it needs to be.
Under the 2026/27 Singles rules, the damper is initially set to 6, but competitors may adjust it. Once you’ve completed the distance, stay on the platform and raise your arm to let the judge know. Wait for their confirmation before leaving. Before your race, check the current rulebook for your own division, too.
Which muscles does the SkiErg work?
Several muscle groups work together throughout the pull. How much each contributes changes as you move through the stroke.
- Lats (latissimus dorsi): Help move your upper arms downwards.
- Abdominal and core muscles: Add power to the pull and control the movement of your torso.
- Triceps: Help straighten your elbows during the pull.
- Glutes and legs: Get involved as you bend forwards, flex your knees and return to an upright position.
The muscles around your shoulders and other parts of your back work as well. In other words, your arms aren’t the only things getting a workout. That doesn’t mean every muscle is loaded equally, though. Think of the SkiErg as a conditioning tool when adding it to your programme. Don’t expect it to replace your back or triceps strength exercises like for like.
How to use a SkiErg
Forget about speed on your first attempt. Start with a low damper setting and an easy pace that lets you pay attention to what you’re doing.
1. Get into the starting position
Stand with your feet roughly shoulder-width apart and your knees slightly bent. Hold the handles just above eye level, with your elbows bent. There’s no need to reach your arms far above your head.
2. Start the pull with your torso
Begin moving your torso downwards and let your hands follow. As your head, chest and shoulders lower together, your abdominal muscles contribute to the pull. Don’t start by simply yanking on the handles with your arms.
3. Move your hips back slightly
Let your knees bend as you lean forwards from your hips. You don’t need to drop into a deep squat on every stroke. Equally, don’t try to keep your torso completely rigid and bend only at the hips. Your abdominal muscles help your torso flex in a controlled way. Avoid forcing the movement through your lower back or dropping farther down than you need to.
4. Finish the pull beside your thighs
Bring your hands down alongside your thighs. Don’t pull the handles well below your knees or swing them behind you. Keep your wrists straight and avoid forcefully locking your elbows.
5. Return upright with control
As you straighten up, bring your hands back to the starting position. Breathe in during this recovery phase and get ready for the next pull. Don’t rush the return just to squeeze in another stroke sooner.

It’s normal to think about these steps separately at first. After a few attempts, the movement of your torso, hips and arms should start to feel smoother. If possible, ask a trainer to watch your first session. It can be easier for someone else to spot a mistake you don’t notice while you’re moving.
Common SkiErg mistakes
- Pulling only with your arms: If your torso barely moves, you may be asking too much of your arms. Slow down and try starting the pull with your torso.
- Squatting too deeply: You don’t need to sink low on every stroke. Move your hips back slightly and let your knees move naturally with the pull.
- Taking the handles too far: Reaching too high at the start or bringing your hands too far behind you at the finish can disrupt your rhythm. Check where each stroke starts and ends.
- Rushing the recovery: When you’re trying to pull quickly, don’t launch into the next stroke before you’re ready for it. Settle into the movement at a calmer pace first.
- Holding your breath: Try breathing out during the pull and in as you straighten up. Find a rhythm that feels comfortable, and avoid holding your breath for several strokes in a row.
What damper setting should you use?
The lever on the side of the machine, marked from 1 to 10, controls how much air enters the flywheel housing. This is the damper. At a higher setting, the flywheel slows down more quickly between strokes, which can make the next pull feel heavier. Turning it up to 10 doesn’t automatically mean you’re getting a better workout. You can still work hard at a low setting by pulling harder.
For your first session, 3 is a good starting point. Concept2’s damper guide recommends that SkiErg beginners start at 3 or lower. Learn the technique at that setting first. Later, you can try different settings and find what suits your pace and workout. The same number may feel different on different machines. If you want to compare settings more precisely, check the drag factor on the monitor.
How should you pace the SkiErg after a run?
When training for HYROX, don’t jump straight into hard pulls the moment you get off the run and onto the machine. Use the first few strokes to bring your breathing and movement into a steady rhythm.
The /500 m value on the monitor shows how long it would take you to cover 500 metres at your current pace. The lower the number, the faster you’re going. But a low split produced by a few strong pulls may not be a pace you can hold for the whole distance.
Start with a controlled opening section and try to keep a similar pace through the middle. Towards the end, you can pick it up a little if your technique is still sound and your breathing allows it. Finding the right pace for you will take a few training sessions.
At the end of the workout, don’t look only at your SkiErg time. Note how you feel when you return to running, too. If gaining a few seconds on the machine leaves you noticeably slower on the next run, try easing off the SkiErg pace a little.
3 SkiErg workouts for beginners
Choose one of the examples below that suits your current level. You don’t need to do all three on the same day. Warm up at an easy pace for a few minutes before starting, and ease the pace down again at the end.
1. Getting used to the machine: 6 × 30 seconds
- SkiErg for 30 seconds at an easy pace.
- Rest for 60 seconds.
- Complete 6 rounds in total.
Focus on technique rather than distance. In one round, you might concentrate on starting the pull with your torso. In the next, focus on where your hands finish or on a controlled recovery. If your movement starts to break down in the later rounds, slow down.
2. Learning to hold a steady pace: 4 × 250 metres
- SkiErg for 250 metres.
- Rest for 90 seconds between rounds.
- Complete 4 rounds in total.
Choose a pace that gets you breathing harder without making your technique fall apart in the final metres. Try to keep your times similar across all four rounds. If the first round is very fast and the last is noticeably slower, start more gently next time. Shorten the distance or take a longer rest if needed.
3. Getting used to the SkiErg after running
Once you’re comfortable with running and the SkiErg separately, you can try this workout:
- Run 400 metres at an easy pace.
- Follow with 250 metres on the SkiErg at a controlled pace.
- Rest for 2 minutes.
- Complete 3 rounds in total.
Focus on finding your rhythm when you move from the run to the machine. If your technique breaks down even in the first round, reduce the running or SkiErg distance. You don’t need to jump straight to the race distances of a 1 km run and 1,000 metres on the SkiErg. Stop if you feel pain. If you have a condition that affects your movement, speak to a healthcare professional or qualified trainer before starting.
What’s the difference between a SkiErg and a rowing machine?
Both machines let you structure a workout around distance, time and pace. But the movements and the way you generate power are different.
| Feature | SkiErg | Rowing machine |
|---|---|---|
| Position | Usually standing | Seated on a sliding seat |
| Movement | Pulling two handles down from above | Pushing with the legs, opening the torso and pulling the handle towards you |
| Power generation | The torso initiates the pull; the back, arms and lower body contribute | The movement starts with the legs, followed by the torso and arms |
| Key technique point | Don’t leave your arms to do all the work | Keep the legs, torso and arms moving in the right sequence |
Different parts of your body work together on both machines. Don’t think of the SkiErg as purely an arm exercise or rowing as purely a leg exercise. And don’t expect to match your 1,000-metre rowing time on the SkiErg. You need to get comfortable with each machine’s technique separately.
If you’re working on the other stations as part of your HYROX preparation, have a look at our farmer’s carry guide. Our guide to choosing HYROX shoes may also help you find a pair for both the runs and the stations.
For your first few sessions, don’t get too caught up in the time on the screen. Learn the pull and find a pace you can comfortably sustain. When you repeat the same workout, look at both your time and how tired you feel. If you’re finishing faster while keeping your technique together, you’ll notice the progress for yourself.
Sources
- HYROX — 2026/27 Singles Rulebook
- Concept2 — SkiErg Technique
- Concept2 — SkiErg Technique: Part One
- Concept2 — SkiErg Technique: Part Three
- Concept2 — Muscles Used While Skiing
- Concept2 — What Is the Best Damper Setting for Me?
- Concept2 — Getting Started on the SkiErg
- Concept2 — Indoor Rowing Technique